Arrays (Ordered Tables)
Previous tutorial: For Loops
You now know how to use variables, create functions, use if statements, create animations, get user input, and use for loops. This tutorial introduces arrays (ordered tables in Lua), which let you store multiple values in a single variable!
The Problem
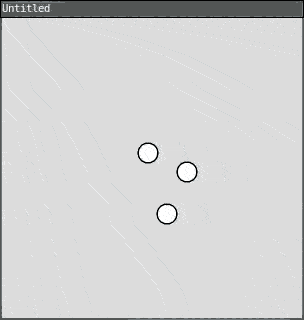
Let's say you want to draw multiple circles that bounce around the screen. You might start with code like this:
require("L5")

circle1X = 100
circle1Y = 100
circle1SpeedX = 2
circle1SpeedY = 1

circle2X = 200
circle2Y = 150
circle2SpeedX = -1
circle2SpeedY = 2

circle3X = 150
circle3Y = 200
circle3SpeedX = 1
circle3SpeedY = -2

function setup()
  size(300, 300)
end

function draw()
  background(220)

  -- Move and draw circle 1
  circle1X = circle1X + circle1SpeedX
  circle1Y = circle1Y + circle1SpeedY
  if circle1X < 0 or circle1X > width then circle1SpeedX = circle1SpeedX * -1 end
  if circle1Y < 0 or circle1Y > height then circle1SpeedY = circle1SpeedY * -1 end
  circle(circle1X, circle1Y, 20)

  -- Move and draw circle 2
  circle2X = circle2X + circle2SpeedX
  circle2Y = circle2Y + circle2SpeedY
  if circle2X < 0 or circle2X > width then circle2SpeedX = circle2SpeedX * -1 end
  if circle2Y < 0 or circle2Y > height then circle2SpeedY = circle2SpeedY * -1 end
  circle(circle2X, circle2Y, 20)

  -- Move and draw circle 3
  circle3X = circle3X + circle3SpeedX
  circle3Y = circle3Y + circle3SpeedY
  if circle3X < 0 or circle3X > width then circle3SpeedX = circle3SpeedX * -1 end
  if circle3Y < 0 or circle3Y > height then circle3SpeedY = circle3SpeedY * -1 end
  circle(circle3X, circle3Y, 20)
end
This is very repetitive! And what if you wanted 10 circles? Or 100?
Arrays (Ordered Tables)
An array is an ordered table in Lua - a table that holds multiple values in a specific sequence.
To create an ordered table in Lua, use curly brackets {}:
circleX = {100, 200, 150}
This creates a table named circleX that holds three values: 100, 200, and 150.
Accessing Array Elements
To access an element in a table, use square brackets [] with an index:
print(circleX[1])  -- prints 100
print(circleX[2])  -- prints 200
print(circleX[3])  -- prints 150
Important: In Lua, arrays start at index 1, not 0!
Arrays and Loops
Arrays become powerful when combined with for loops. Instead of writing repetitive code for each circle, you can use a loop:
require("L5")

circleX = {100, 200, 150}
circleY = {100, 150, 200}
circleSpeedX = {2, -1, 1}
circleSpeedY = {1, 2, -2}

function setup()
  size(300, 300)
end

function draw()
  background(220)

  for i = 1, 3 do
    -- Move circle
    circleX[i] = circleX[i] + circleSpeedX[i]
    circleY[i] = circleY[i] + circleSpeedY[i]

    -- Bounce off edges
    if circleX[i] < 0 or circleX[i] > width then
      circleSpeedX[i] = circleSpeedX[i] * -1
    end
    if circleY[i] < 0 or circleY[i] > height then
      circleSpeedY[i] = circleSpeedY[i] * -1
    end

    -- Draw circle
    circle(circleX[i], circleY[i], 20)
  end
end
Now the code is much shorter and easier to work with!
The # Operator
Instead of hardcoding the number of elements, you can use the # operator to get the length of a table:
for i = 1, #circleX do
  -- code here
end
This makes it easy to add or remove elements without changing your loop!
Adding Elements
You can add elements to a table using table.insert(). This takes two arguments: the name of the table, and the item you want to insert at the end:
table.insert(tableName, value) -- adds to end
Optionally, you can specify an index as the second argument to insert the new element at a specific position in the table:
table.insert(tableName, index, value) -- inserts at specific position
Here's an example:
require("L5")

circleX = {}
circleY = {}

function setup()
  size(300, 300)
  background(220)
end

function draw()
  -- Don't clear background - leave a trail
end

function mousePressed()
  table.insert(circleX, mouseX)
  table.insert(circleY, mouseY)

  -- Draw all circles
  for i = 1, #circleX do
    circle(circleX[i], circleY[i], 30)
  end
end
This program adds a circle wherever you click!
Removing Elements
You can remove elements using table.remove(). This works similarly to table.insert() - you pass it the table name, and optionally an index:
table.remove(tableName)        -- removes last element
table.remove(tableName, index) -- removes element at specific position
If you don't specify an index, it removes the last element. If you do specify an index, it removes the element at that position.
Here's an example:
require("L5")

circleX = {}
circleY = {}

function setup()
  size(300, 300)
end

function draw()
  background(220)

  -- Draw all circles
  for i = 1, #circleX do
    circle(circleX[i], circleY[i], 30)
  end
end

function mousePressed()
  -- Add circle at mouse position
  table.insert(circleX, mouseX)
  table.insert(circleY, mouseY)
end

function keyPressed()
  -- Remove last circle when any key is pressed
  if #circleX > 0 then
    table.remove(circleX)
    table.remove(circleY)
  end
end
Click to add circles, press any key to remove the last one!
Random Initialization
You can use loops to fill arrays with random values:
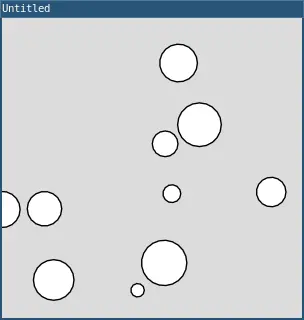
require("L5")

circleX = {}
circleY = {}
circleSize = {}

function setup()
  size(300, 300)

  -- Create 10 random circles
  for i = 1, 10 do
    circleX[i] = random(width)
    circleY[i] = random(height)
    circleSize[i] = random(10, 50)
  end
end

function draw()
  background(220)

  -- Draw all circles
  for i = 1, #circleX do
    circle(circleX[i], circleY[i], circleSize[i])
  end
end
This creates 10 circles at random positions with random sizes!
Nested Tables (2D Arrays)
You can create tables of tables (2D arrays) for grid-based data:
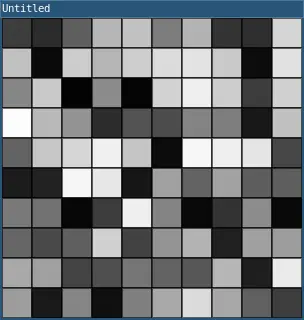
require("L5")

grid = {}

function setup()
  size(300, 300)

  -- Create a 10x10 grid
  for row = 1, 10 do
    grid[row] = {}
    for col = 1, 10 do
      grid[row][col] = random(255)
    end
  end
end

function draw()
  for row = 1, 10 do
    for col = 1, 10 do
      fill(grid[row][col])
      rect((col - 1) * 30, (row - 1) * 30, 30, 30)
    end
  end
end
This creates a grid of randomly colored squares!
Example: Snake Trail
Here's a complete example that creates a trail that follows the mouse:
require("L5")

trailX = {}
trailY = {}
maxLength = 20

function setup()
  size(300, 300)
end

function draw()
  background(220)

  -- Add current mouse position
  table.insert(trailX, mouseX)
  table.insert(trailY, mouseY)

  -- Remove oldest position if trail is too long
  if #trailX > maxLength then
    table.remove(trailX, 1)
    table.remove(trailY, 1)
  end

  -- Draw trail
  for i = 1, #trailX do
    size = (i / #trailX) * 30
    circle(trailX[i], trailY[i], size)
  end
end
This creates a trail that follows your mouse, with circles getting bigger toward the mouse!
Practice
Congratulations! You've now learned the fundamentals of arrays through ordered tables in L5. Here are some ideas to practice with arrays:
- Create a drawing program that stores all your strokes and can replay them
- Make a simple particle system with many moving circles
- Create a "snake" game where the snake grows as it eats food
- Build a simple animation with multiple objects moving in patterns
- Make a starfield with twinkling stars
- Create a rain animation with many falling drops
- Build a simple physics simulation with bouncing balls
Next tutorial: Using Objects
This tutorial is adapted from Arrays by Happy Coding, licensed under CC BY 4.0.